Thursday, February 11, 2010

Knitted hats for Christmas

Yeah, I'm going to talk about Christmas gifts in February. I've been busy. ;]
Last Christmas was going to be the year of gifting knitted hats. I had plans to make eleven hats. Five got finished and only three before Christmas, but I have been forgiven.
For budget and both the mamas' sanity I chose acrylic yarn for all the hats. I didn't want to taint the gifts by adding a bunch of washing/drying stipulations causing the hats to either not get worn or ruined in the wash. Or have the mamas dread getting knitted gifts.
First up was the Button Tab Hat for our 6 year old niece. It is the second time I used this pattern. It is so quick to knit, easy and customizable. Three of my favorite aspects of a knitted object. I had to reduce the number of cast on stitches by 10 to make it fit a child's head, but that was easy. The brim is (my favorite) seed stitch and the button is a cute little lime green flower. The yarn is Vanna's Choice by Lion Brand in Purple Mist on US 6 dpns.
Next was the Lacy Rib Hat by Heather J. Spellman for our 10 year old niece. When it's stretched out a bit on her head you can see the lace pattern better. This was fun to knit. The pattern had just enough challenge to it to keep it interesting without being too trying. I did make some mistakes, but they blend in pretty well. This time I used Lion Brand Vanna's Choice in Seaspray Mist on US 6 dpns.
I actually had to do the picot edging twice. It was the first time I tried to make one and I didn't pick up the stitches from the cast on edge evenly and it got all wonky. Wonky can be great in quilt blocks, not so much in hat edging. The second go round was much better. I used stitch markers to keep me on track.
For our final niece I made the Lacy Hat. (Non-Ravelry link to pattern) The recipient is 8 years old and her favorite colors are red and black. I think this is may favorite of the three hats for our nieces. Again, the lace pattern is shown better when it's worn, but it is so cute. The picot edge for this was a breeze applying lessons learned. I got into a nice flow with the gull wing lace pattern. The yarn in Caron's Simply Soft in red (Scarlet, I think, is the correct color name). The ribbon is simple black satin which keeps the hat from looking too cutesy. She is 8 after all. ;]
{My Ravelry Link for the blue and the yellow hat for my friends' 5 and 3 year old boys}
I've had this hat in my queue for over a year. I loved it from the first time I saw it, but didn't have the skills (or balls) to make it before now. (On a not-completely-unrelated topic I have decided to take more risks knitting. There is really nothing to lose. I don't consider the time lost as I am learning either how-to or how-not-to do something. The project can always be frogged and the yarn saved for another project unlike sewing where if you cut wrong it can really screw things up. I cut it twice and it's still too short comes to mind. That doesn't happen with knitting. Love it. Back on topic.)
I didn't have a great handle on the Kitchener stitch for seaming the top and had no idea how to make the i-cord for the ties. Have several socks completed I was getting there with the Kitchener stitch (it's used to seam up the toes) and I pulled up the instructions for making an i-cord on knittinghelp.com and got to work.
I made the older boy's hat first. Yet again it was made with Lion Brand Vanna's Choice yarn but in Denim Mist this time. Blue has been his favorite color since I asked him for the first time when he was three.
I was so excited to get them both finished and in the mail I forgot to take pictures of the hats. Their mama took an appreciation photo for me. He's got the hat on backwards in the photo which is why the ear flaps are covering part of his face. However, it kind of shows why this is called Triceratops hat. It comes to three points at the top.
His little brother wanted a yellow hat, but it is hard to find yellow that isn't overtly baby yellow or traffic sign/day-glo yellow. Lion Brand Vanna's Choice Baby in Ducky seemed like a good shade of yellow. As I got stitching though I thought it was leaning towards being too baby-ish. I pulled out some light blue Lion Brand yarn from my stash and used it to make a 1-1/2" wide stripe on the top, the ear flaps and ties. It think it brought it back to kid-style.
Since then I have cast on a dish washing cloth in a pattern from the Vogue Stitchionary called Tiny Bamboo, the Odessa hat (with beads, see risk taking above) for me in an awesome Bamboo Wool from Moda Dea and have to cast on at least 3 of those other hats which are now intended as birthday gifts (in February, why do I keep doing that?).
Oh, yeah, and I joined Team Sasquach in the Ravelympics (Ravelry + Olympics = Ravelympics) starting when the official Olympic torch lights tomorrow. Planning to make my first felted project. Some super cute slippers. Gotta get stitching. =]

Quilter Bees blocks catch up

In an effort to catch up with all the behind blocks I owe, I pumped out these two for Quilter Bees Heidi and Lisa.

In December Lisa asked us all to make stars from Amanda Jean's tutorial. I was pretty nervous about this block. I had used Amanda Jean's tutorials before and didn't have any issues with that, I am just not that great at straight lines. Drawing, cutting, walking, driving...I don't do any of these straight. I wanted to wait until I had the time and attention to put into doing this block right.

Unfortunately that didn't come until last weekend. (Life got a little hairy and my sewing machine was inaccessible for about 6 weeks.) When we got my new sewing space situated and Midge back from her hiatus this was the first on the to do list. By the way, I recently decided my sewing machine is a Midge. I've had her for about two years and didn't have any inclination to name her until the new sewing space was made.

I didn't have any trouble with the individual blocks that went to the construction of the whole block, but after sewing everything together I was about 1/4" short of 12.5" So I ripped the seams and shrunk the seams to about 1/8"-3/8" to make up for it. I hope that doesn't create any problems. I don't think it will, they are secure. Minus the scant seam allowance I surprised myself with this block. And it taught me a lesson for Lisa's block.


Lisa chose another Amanda Jean block tutorial and I was able to kick this baby out fairly easily. And I measured as I pieced each section. No ripping this time. It's not perfect, but again I hope it is C.E. (close enough).

Neither of these are blocks I imagined myself choosing to make, which is the whole point of joining quilting bees. I forces me (nudges me?) to create outside my comfort zone. If nothing else these two blocks are getting me into the habit of slowing down and concentrating on what I am sewing. I appreciate that to no end. =]

Snip.Sew.Send. January Log Cabins

Robin's idea for January's installment for Snip.Sew.Send. was awesome and right up my alley. I get into a kind of zen meditation when making log cabins. That was a welcome feeling with all the craziness lately. (Nothing bad, get life amping itself up.)


I got to make the green and pink blocks. The goal was to make one straight log cabin and one wonky. For the straight green cabin I laid out the fabrics on my ironing board and tried to put the fabrics in shade groups light, medium, bright and dark. The middle block is a faint-ish floral that I really liked. It had all the shades in it and was perfect for the center square. Then I spiraled out using one strip of each shade as I went around. I put a star on the fabrics from my stash.
When I was happy with it I snapped a quick photo and labeled each strip with a piece of tape and a tag for the order 1L (first log on the left), 1B (first log on the bottom, 1R (first on the right) and 1T (first on the top), etc. I had read about this somewhere else and never tried it until now. It was great, especially since I got called away during the construction. It made it much easier to get back in to the flow when I returned.

Here's the final block. I am pretty pleased with the result. The final strip on the right is a fabric Chen sent me at the beginning of this bee. I thought it was a good addition.

Next, I worked on the pink block. This one was going to be wonky and as soon as I opened the package from Robin I knew the bunnies were going to steal the spotlight of this one. They are so flippin' cute. I LOVE making wonky log cabins and I hope Robin likes this one. I just kind of went on a wing and a prayer with this block. Didn't really plan much other than the bunny in the center. The dark pink stripes are from my stash. I didn't notice them jumping out quite as much until I cropped the picture. I hope it settles in.

Robin~Although I made these last weekend they are still in the envelope addressed and ready to go. I kept forgetting to take them to the post office with me. They are now in my bag and (as long as I don't space out again) they will be on the way to you tomorrow. I'm not blonde, but I sure can act like it sometimes. =]

Friday, December 18, 2009

Simplicity Patterns for $1.99 each

Just a quick note on the go. Hobby Lobby has in stock Simplicity patterns on sale for $1.99 each (limit 10). I picked up a Project Runway coat pattern (2812) normally $15.95 for a little over two bucks with tax. As far as I know the sale is good through Saturday the 19th.

=]

Sent via BlackBerry by AT&T

Wednesday, December 2, 2009

Snip.Sew.Send. ~ November for Gretchen

Gretchen, these are on the way to you. Gretchen had asked for 2". 3.5", 6.5" and 9.5" blocks to make her own quilt like these. Like everyone else in the bee has said these were addictively fun. My measuring sucks, apparently, because I tried to make a 9.5" block, but couldn't work it out. Also the bottom right one is only 6" (I didn't have strips long enough to go around to make it large enough). Maybe she can use it as a base for a 9.5" block? I also tried twice to make a 2" block. Disastrous.

Surprisingly I really liked how the fabrics worked together. Surprising because if Gretchen had just told me about the color palette I would have thought she was crazy. I think the brown, orange and teal look so cozy and inviting together. My favorite is the top left and the small brown and teal one. This will be an awesome quilt.

I have had my Snip.Sew.Send. quilt top and back finished for about two months but just haven't put aside the hours I'll need to baste it. It will be a full/queen sized. Yikes! =]

Socks and a cat...but not a cat named Socks

That title may not be true. I don't know what the cat's name is, but I saw this on the way home last week. I was stopped at a red light downtown and saw the cat watching traffic from the window. Amazingly I had the camera with me and was able to zoom enough to see it clearly.

{Kitty watching the traffic below}
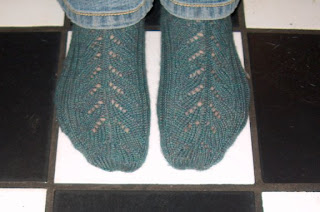
I finished my Through the Loops Mystery Socks. Although they are far from perfect I *love* them. They are the first pair of socks I ever finished. I used an alpaca/wool blend yarn that is delicious feeling on my feet.

{Pair doesn't have to mean the look the same}

With these socks I learned how to properly make yarn overs and read from a chart (love that too). Since I hadn't learned to make yarn overs I took for granted that all knitting books would explain it correctly. Not so. That's why the legs look different. The right one (in the photo) was made with incorrect yarn overs and that's why the ribs don't line up. It just looked wrong and after seeing progress photos on Ravelry I found out it was. After more research I learned how to yarn over properly so the foot looked better. Since I don't wear socks and shorts, they will look good under my pants.

{Much better}

My project link on Ravelry.
Mystery Sock pattern as a free Ravelry download which is from Kirsten Kapur (her website).

Now to find cute shoes to show them off. =]

Thursday, October 29, 2009

Better Than a Box aka my pattern in One Yard Wonders

Jeffery T. loves a box. As soon as he sees an open box he is in it without regard to whether or not the box is empty or about to be used for something other than holding a fat cat. Here are some examples.


{We call this the luxury box, notice the flap over lid for extra lounging space all of which is being utilized.}

{The creases is from Jeffery T. forcing himself in a too small box.}
In an effort to save our boxes I made Jeffery T. a comfy, cosy bed. It was a hit and better than a box.
{Perfect for watching lizards run around outside}

{A view with out T. He was most likely eating.}
{One day when I was leaving for work, I thought he looked all cute laying in his bed}
{And it is just were I found him 10 hours later when I got home from work}
Since T. likes it so much, I thought other kitties might like it too. I read about a new book looking for submissions for sewing patterns using only one yard of fabric on Sew, Mama, Sew! The pattern was submitted and, much to my surprise, Rebecca and Trish chose it as part of their book One Yard Wonders. Yea!
Flash forward about a year and the book has been printed and was shipped yesterday! I haven't seen it in the flesh yet, but I can't wait. Of course I want to see the Better Than a Box pet bed, but also the other projects. Just in time for Christmas gift making. Couldn't be better.
After the pattern was chosen, I was sent a yard of fabric to remake the pet bed for the photography in the book and the trunk show, etc. Jeffery T. approved of it, too.
{He tried to claim it for his own.}

{I say, "No, Jeffery T. This is not for you." Jeffery T. says "I can't hear you. I am sleeping."}

Apparently, dogs think it is Better Than a Box, too. Sure, small dogs will like it, but big dogs, too. Proof?

{Pea, thinking thin and jamming herself into the bed.}

{And Beeker called dibs on his friend's.}
Rebecca and Trish are having a release party on November 6 at Crafty Planet in Minneapolis. Click the link for more details. The Flickr group is up and ready for photos. Now, go get the book and start cutting that coveted yard of fabric you've saved for just the right project. You'll find it in there. =]